
環境
- macOS Monterey 12.6
- VSCode
- node.js v18.6.0
- npm 8.13.2
- Typescript ^5.0.2
- vite ^4.4.5
- vitest ^0.34.2
前置き
本記事で説明すること
以下の記事で関数テストの環境構築と実装、テストの作成、パスエイリアス、カバレッジ設定まで完了した。本記事では、Vueコンポーネントのテスト環境構築、コンポーネントの実装とテストの作成を行う
【Vitestで始める単体・結合テスト】関数テストの環境構築と作成
reactを使用したケースはこちら
【Vitestで始める単体・結合テスト】ReactコンポーネントとカスタムHooksのテストの環境構築と作成(testing-library/react)
vue-test-utilsを使用したケースはこちら
【Vitestで始める単体・結合テスト】Vueコンポーネントテストの環境構築と作成(vue-test-utils)
コンポーネントテスト全般のTIPSなどまとめはこちら
【Vitestで始める単体・結合テスト】保守性の高いテストのTIPSやポイント
構成
Vue Testing Library
- コンポーネントテスト用
- DOMのレンダー、要素の取得、ユーザーのイベント処理用のメソッドなどを提供
- すでにVue3に対応。testing-library/vueはV6系がVue3、V5系はVue2の模様
https://github.com/testing-library/vue-testing-library/releases
Vue3
- UIフレームワーク
コンポーネントテスト
環境構築
コンポーネントテスト用の依存関係を追加
- @testing-library/vue
- Vue Test UtilsをラップしたVueコンポーネントをテストするためのライブラリ
- Vue Test Utilsよりも、testing-library/vueはより実際のアプリケーションの使用方法に近い形でテストを記述できる (レンダリングされた Vue コンポーネントのインスタンスを扱うのではなく、実際の DOM ノードに関心を持つ)
- 提供元がReact Testing Libraryと同じ
- @testing-library/user-event
- @testing-library/vueには含まれていないユーザーのクリックイベント(click)や文字入力イベント(type)などを提供するライブラリ。組み込みのfireEventよりもよりユーザーの操作に近い記述が可能
- happy-dom
- 本来ブラウザでしかDOMを使用できないが、サーバーサイドなどで仮想的にDOMツリーを生成するためのライブラリ。js-domより高速
- @testing-library/jest-dom
- 拡張マッチャー(toBeInTheDocument、toBeVisible、toHaveClassなど)を使用する場合に必要なライブラリ
npm install -D @testing-library/vue @testing-library/user-event happy-dom @testing-library/jest-domsetupファイル追加
これにより、各テストファイルでimportする必要がなくなり、かつtesting-libraryの拡張マッチャー(toBeInTheDocumentなど)を使用できるようになる。これは、vueであっても、reactであってもTypeScript環境下で拡張マッチャーを使用したい場合は必要。
GitHub - testing-library/jest-dom: :owl: Custom jest matchers to test the state of the DOM
tests/setup.ts
import "@testing-library/jest-dom";Viteの設定ファイル(vite.config.ts)調整
Domを単体テストの中で扱えるように、environmentにhappy-domを追加
/// <reference types="vitest" />
import { defineConfig } from "vitest/config";
import vue from "@vitejs/plugin-vue";
export default defineConfig({
plugins: [vue()],
test: {
globals: true,
alias: {
"@": path.join(__dirname, "/src"),
},
environment: "happy-dom", // here
},
});setupファイルの指定
上記で作成したsetupファイルが全てのテストファイルで実行されるように指定
/// <reference types="vitest" />
import { defineConfig } from "vitest/config";
import react from "@vitejs/plugin-react";
export default defineConfig({
plugins: [react()],
test: {
globals: true,
alias: {
"@": path.join(__dirname, "/src"),
},
environment: "happy-dom",
setupFiles: ["./tests/setup.ts"], // here
},
}コンポーネントの実装
対象のコンポーネント
以下3種類についてコンポーネントとテストをそれぞれ作成する。
- inputコンポーネントを作成し、文字入力イベントを検証する
- Formコンポーネントを作成し、文字入力とボタンのクリックイベントを検証する
- TodoListコンポーネントを作成し、クリックイベントとAPI通信を検証する
inputコンポーネント
labelやid、valueとvalueを変更するための関数onChangeなどをpropsとして受け取る。inputに対して入力されるとonChangeが発火する
src/components/TextInput.vue
interface TextInputProps {
label: string;
id: string;
name?: string;
value: string;
onChange: (event: React.ChangeEvent<HTMLInputElement>) => void;
}
const TextInput: React.FC<TextInputProps> = ({
label,
id,
name,
value,
onChange,
}) => {
return (
<div className="mb-4">
<label
className="block text-gray-700 text-sm font-bold mb-1"
htmlFor={id}
>
{label}
</label>
<input
name={name}
type="text"
id={id}
className="w-full px-3 py-2 border rounded-lg border-gray-300 focus:outline-none focus:ring focus:border-blue-300"
value={value}
onChange={onChange}
/>
</div>
);
};
export default TextInput;
Formコンポーネント
src/components/Form.vue
<script setup lang="ts">
import TextInput from "@/components/TextInput.vue";
import { ref } from "vue";
const inputValue = ref<string>("");
const submitted = ref<boolean>(false);
const message = ref<string>("");
const submit = (inputValue: string) => {
message.value = inputValue;
submitted.value = true;
};
</script>
<template>
<section>
<p v-if="submitted" data-testid="submitted-message">
{{ `${message}を送信しました` }}
</p>
氏名:<TextInput v-model="inputValue" />
<div style="margin-top: 20px">
<button
@click="submit(inputValue)"
style="background-color: white; color: #000; padding: 5px 10px"
>
送信する
</button>
</div>
</section>
</template>TodoListコンポーネント
依存関係の追加
axiosをインストール
npm install axiossrc/components/TodoList.vue
<script setup lang="ts">
import axios from "axios";
import { ref } from "vue";
// ほんとは型定義ファイルを作るべき
export type Todo = {
userId: number;
id: number;
title: string;
completed: boolean;
};
const todos = ref<Todo[]>([]);
const fetchTodos = async () => {
axios
.get("https://jsonplaceholder.typicode.com/todos")
.then((res) => {
console.log(res.data);
todos.value = res.data;
})
.catch((err) => {
// デモなので割愛
console.log(err);
});
};
</script>
<template>
<button @click="fetchTodos">記事取得</button>
<ul>
<li v-for="todo in todos">{{ todo.title }}</li>
</ul>
</template>画面上ではこのようなかんじ

テスト作成
inputコンポーネントのテスト
- renderメソッドによりTextInputコンポーネントをレンダリングする
- renderメソッドの返り値からDomから要素を取得するための各種メソッドが使える
- ユーザーの使い方に近いほうがいいので基本的にはgetByRoleを、エスケープハッチとしてgetByTestIdなどを使う
- inputタグのroleはtextboxなのでgetByRoleでinput要素を取得できる
- input要素に対して任意の文字列を入力する
- インタラクティブな操作は非同期処理なのでasync awaitにする必要があるので注意
- 最後に、期待する文字列がinput要素のvalueとして保持されているかアサートする
tests/components/TextInput.test.ts
import { render } from "@testing-library/vue";
import TextInput from "@/components/TextInput.vue";
import user from "@testing-library/user-event";
describe("TextInput", () => {
it("テキストインプットに文字を入力できる", async () => {
const { getByRole } = render(TextInput);
const input = getByRole("textbox") as HTMLInputElement;
await user.type(input, "大阪太郎");
expect(input.value).toBe("大阪太郎");
});
});Formコンポーネントのテスト
tests/components/Form.test.ts
テスト
- renderメソッドによりFormコンポーネントをレンダリングする
- renderメソッドの返り値からDomから要素を取得するための各種メソッドが使える
- inputタグへの文字入力はすでに説明済みなので割愛
- 送信ボタンの要素を取得しクリックイベントを発火させる
- 最後に、期待する文字列が画面上に表示されているかアサートする
import Form from "@/components/Form.vue";
import { render } from "@testing-library/vue";
import user from "@testing-library/user-event";
describe("Form", () => {
it("Formに文字を入力し送信すると、入力した内容が画面上にメッセージとして表示", async () => {
const { getByRole, getByTestId } = render(Form);
const input = getByRole("textbox") as HTMLInputElement;
const submitButton = getByRole("button");
await user.type(input, "京都花子");
await user.click(submitButton);
expect(getByTestId("submitted-message").textContent).toBe(
"京都花子を送信しました"
);
});
});TodoListコンポーネントのテスト
- vitestのvi.spyOnによりaxiosのgetメソッドをモックにし、返り値を固定化する
- jsonplaceholderよりtodoリストのデータを取得する処理をモックに置き換える
- renderメソッドによりTodoListコンポーネントをレンダリングする
- renderメソッドの返り値からDomから要素を取得するための各種メソッドが使える
- TODO取得ボタンの要素を取得しクリックイベントを発火させる
- 最後にアサートする
- モック関数が期待する引数を与えられて呼び出されたか
- Todoのタイトルが画面上に表示されているか
tests/components/TodoList.test.ts
import TodoList from "@/components/TodoList.vue";
import { render } from "@testing-library/vue";
import user from "@testing-library/user-event";
import axios from "axios";
import type { Todo } from "@/components/TodoList.vue";
describe("TodoList", () => {
it("送信ボタンを押すとTODOリストの一覧が表示", async () => {
const mockTodos: Todo[] = [
{ userId: 1, id: 1, title: "title1-1", completed: false },
{ userId: 1, id: 2, title: "title1-2", completed: true },
{ userId: 2, id: 1, title: "title2-1", completed: false },
{ userId: 3, id: 1, title: "title3-1", completed: true },
{ userId: 3, id: 2, title: "title1-2", completed: false },
];
const axiosGetMock = vi
.spyOn(axios, "get")
.mockResolvedValue({ data: mockTodos });
const { getByRole } = render(TodoList);
const submitButton = getByRole("button");
await user.click(submitButton);
expect(axios.get).toHaveBeenCalledWith(
"https://jsonplaceholder.typicode.com/todos"
);
expect(axiosGetMock).toHaveBeenCalledOnce();
expect(getByRole("list").childElementCount).toBe(5);
});
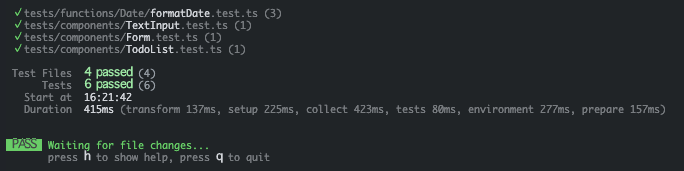
});実行
npm run test全てのテストが通っていればOKです。
composable関数のテスト
Vue3のComposition API を活用して状態を持つロジックをカプセル化して再利用するための関数
composables関数の実装
テスト対象の関数。カウンターをプラスしたりマイナスしたりする
src/composables/counter.ts
import { ref } from "vue";
const useCounter = () => {
const counter = ref(0);
const inc = () => {
counter.value++;
};
const dec = () => {
counter.value--;
};
return {
counter,
inc,
dec,
};
};
export default useCounter;テスト作成
- renderHookメソッドの引数に、コールバック関数の形でテスト対象のカスタムHookを指定する
- cleanup()はレンダリングされたフックをアンマウントする関数。カスタムhooks内で副作用がある場合は、テスト毎にcleanupした上でテストをすること
- ステートの更新関数を実行したい時は、act関数の中で実行する必要がある
tests/composables/counter.test.ts
import useCounter from "@/composables/counter";
import { describe, expect, it } from "vitest";
describe("composable関数: useCounter", () => {
it("カウンターをインクリメントとデクリメントできる", () => {
const { counter, inc, dec } = useCounter();
inc();
dec();
inc();
inc();
expect(counter.value).toEqual(2);
});
});実行
npm run test全てのテストが通っていればOK。

まとめ
いかがでしたでしょうか。本記事では、viteベースのvitestででtesting-libraryを用いてvueコンポーネントの実装と単体・結合テスト、composable関数の環境構築、テストの作成などについて説明しました。コンポーネントテストを行うために必要な依存関係や設定が少し複雑なのと、ネット上にはまだそれほど充実した記事はないので、ぜひ参考にして構築してみてください。


